Photoshop is an incredibly powerful image editing software that provides users with a variety of tools to manipulate and adjust their images. One of the most commonly used tools is the Zoom Tool, which allows users to zoom in and out of their images, making it easier to work on specific areas of the image.
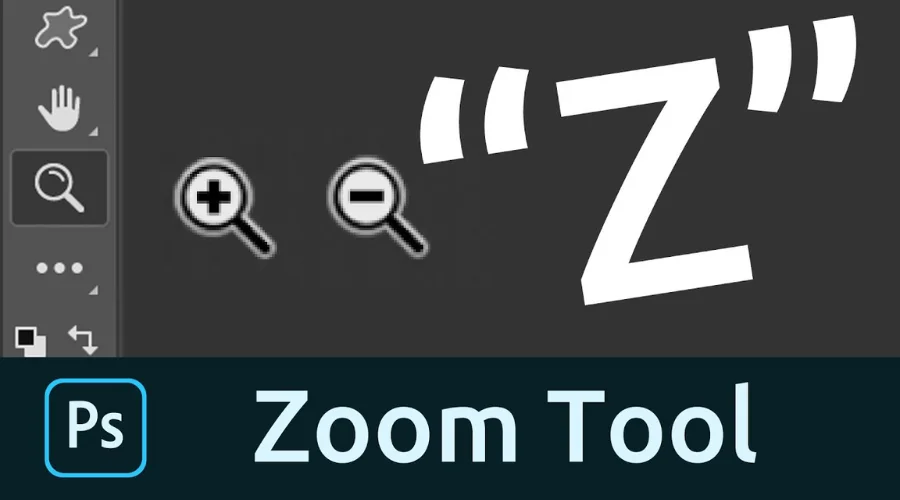
The Zoom Tool is located in the Tools panel on the left-hand side of the Photoshop interface. It is represented by a magnifying glass icon, and its shortcut key is “Z.” By default, the Zoom Tool zooms in when you click on an area of the image and zooms out when you Alt/Option + click on the image.
Benefits of using Zoom Tool in Photoshop:

zoom in Photoshop is a powerful feature that is used to increase or decrease the magnification of an image in a smooth and efficient manner. It is a tool that is often used by designers and photographers to make precise adjustments to their work. This tool has many benefits that can help enhance the workflow of the user.
1. Precise Editing
One of the biggest advantages of using the Zoom Tool in Photoshop is that it allows for precise editing. When an image is zoomed in, it becomes easier to see the details, making it easier to make adjustments. This is especially helpful when working on small or intricate details, such as retouching a portrait. With the help of the Zoom Tool, you can easily select and edit individual pixels with greater accuracy.
2. Improved Productivity
Another benefit of using the Zoom Tool in Photoshop is that it can greatly improve productivity. The value of time in project labor cannot be overstated. The Zoom Tool enables the user to quickly zoom in and out of the image, allowing for quick navigation around the workspace. This feature reduces the need for scrolling or panning around the image, which can save time and effort.
3. Better Viewing Experience
Using the Zoom Tool in Photoshop provides a better viewing experience for the user. When zooming in, the user can see more details and get a closer look at the image. This can be especially helpful when working on high-resolution images, as it can be difficult to see small details when the image is at a lower magnification. With the Zoom Tool, the user can zoom in and out to get the best view of the image.
4. Accurate Selections
The Zoom Tool in Photoshop is also useful for making accurate selections. When an image is zoomed in, it is easier to see the edges of the object, making it easier to make precise selections. This is especially useful when selecting objects with intricate or complex shapes. With the Zoom Tool, the user can make precise selections with ease, saving time and effort.
5. Better Control
Finally, the Zoom Tool in Photoshop provides better control over the editing process. By zooming in, the user can make small adjustments to the image with greater precision. This feature enables the user to focus on the details and make adjustments that are specific to the needs of the project. With better control over the editing process, the user can create a more polished and professional final product.
How to Use Zoom Tool in Photoshop

The Zoom Tool in Adobe Photoshop is a crucial feature that enables users to zoom in or out of an image for better visibility and editing. Whether you are working on a high-resolution photograph or a low-resolution graphic design, the Zoom Tool can help you view and edit your work with precision. Getting Started with the Zoom Tool
The Zoom Tool is located in the toolbar on the left-hand side of the Photoshop window. It looks like a magnifying glass with a plus (+) sign on it. To access the Zoom Tool, simply click on it with your mouse or press the letter Z on your keyboard. Once selected, your cursor will turn into a magnifying glass, and you can begin zooming in or out of your image.
1. Zooming In and Out
To zoom in on an image, click on the area you want to zoom in on with your mouse. Each click will zoom in closer to the image, making it larger and more detailed. Alternatively, you can hold down the Alt key (Option key on a Mac) and click on the image to zoom in continuously until you release the key. This is known as the Zoom In tool.
To zoom out of an image, simply hold down the Alt key (Option key on a Mac) and click on the image with your mouse. Each click will zoom out further, making the image smaller and less detailed. Alternatively, you can use the Zoom Out tool by holding down the Ctrl key (Command key on a Mac) and clicking on the image.
2. Navigating While Zoomed In
When you zoom in on an image, you may need to navigate around it to work on specific areas. To do this, simply hold down the spacebar on your keyboard. Your cursor will turn into a hand, and you can click and drag the image to move it around while still zoomed in.
3. Zoom Tool Shortcuts
Photoshop also offers several shortcuts for using the Zoom Tool. Some of the most helpful ones are as follows:
- Ctrl++ (Command++ on a Mac) – Zooms in on the image
- Ctrl+- (Command+- on a Mac) – Zooms out of the image
- Ctrl+0 (Command+0 on a Mac) – Fits the entire image to the screen
- Ctrl+1 (Command+1 on a Mac) – Sets the zoom level to 100%
Conclusion
The Zoom Tool in Photoshop is a powerful tool that allows users to zoom in and out of their images, making it easier to work on specific areas of the image. By using the Zoom Tool options and tips, users can work more efficiently and effectively on their images. Whether you are a professional photographer or a casual user, the Zoom Tool is an essential tool in Photoshop that can help you create stunning images. For more information, visit Savewithnerds.
FAQ’s


